

Oops! Something went wrong with the browser.
Please try again. If the issue persists, contact support@logicimtech.com and include error code .
Logicim's ready-to-use Sage 50 US Time Slip Report
Introduction
Time Slip Report is an Employees and Payroll Ready-to-Use Report for Sage 50 US. It shows time slip activity for the selected date range so you can review recorded hours or time entries in Excel.
Prerequisites
- Sage 50 US edition
- View other prerequisites in the Requirement section here
What the Report Does
The Instructions worksheet provides start and end date fields in C9 and C10. The Report worksheet shows the company name, Time Slip Report title, selected period, Ticket Date, totals, and a Grand Total row. The hidden Data worksheet includes time slip fields such as Ticket Date, Cust/Job/Admin, and Job ID, with formulas that format time values for the Report output.
How to Use the Report
Step 1. Enter the start date in C9 and the end date in C10 on the Instructions worksheet.
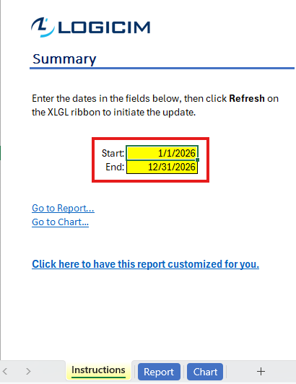
Step 2. Click Refresh on the XLGL ribbon.

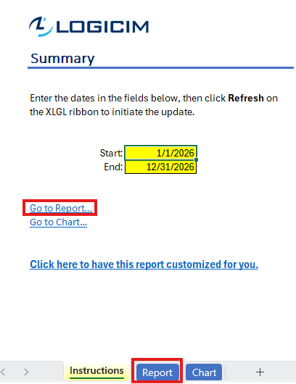
Step 3. Click Go to Report... or open the Report worksheet and review the time slip activity, ticket dates, and totals for the selected period.
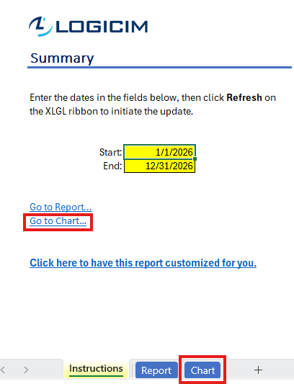
Step 4. Use Go to Chart... or open the Chart worksheet to review the chart.
Customization Options
Change C9 and C10 on Instructions to review a different period. You can use normal Excel sorting, filtering, and formatting on a copy of the workbook. For additional fields, job-specific grouping, different calculations, or layout changes, use the customization link on Instructions or request a Custom Report from Logicim.
Common Use Cases
- Review time slip activity for a selected period.
- Check time entries by ticket date.
- Review job-related time slip fields such as Job ID when they are present in the data.
- Support payroll or job review by checking the totals shown on Report.
Troubleshooting
- If the period shown on Report is not what you expected, check C9 and C10 on Instructions and refresh the workbook.
- If values appear stale or unexpected, confirm that Excel is connected to the correct Sage 50 US company through Logicim XLGL, then refresh again.
- If expected time slips are missing, confirm that the selected dates include the ticket dates you expect to review.
- If Excel prompts about workbook links, keep the source workbook unchanged and contact Logicim Support if the prompt blocks normal use.
FAQs
- Q: Which dates control the Report? A: The start date in C9 and end date in C10 on Instructions control the selected period.
- Q: Where do I review the output? A: Click Go to Report... and review the Report worksheet.
- Q: Does the evidence show job-related time slip fields? A: Yes. The hidden Data worksheet includes Cust/Job/Admin and Job ID fields.
- Q: Can this Report be customized? A: Yes. Use the customization link on Instructions or request a Custom Report from Logicim.
Best Practices
- Confirm the Sage 50 US company before refreshing the workbook.
- Review C9 and C10 before using the Report for payroll or job review.
- Refresh the workbook after changing the date range.
- Use a copy of the workbook before applying Excel sorting, filtering, or formatting changes.
- Compare the Grand Total row with the total you expect for the selected time slip period.
Related articles
No related articles found
Edited: Tuesday, August 25, 2026
Was this article helpful?
Thank you! Your feedback matters.